While perusing my favorite blogs a while back, I found some information on making yogurt (see http://heavenlyhomemakers.com/blog/make-your-own-yogurt-and-cream-cheese). I checked it out, and, as usual, I got super excited. If my husband didn't keep me in check I would waste so much money on the things I get excited about (many of which I don't actually finish). I did "need" to buy some glass jars. Unfortunately, I've realized since then, if I'd been more patient, I could have just accumulated various glass jars to use. But, that's what I get for being impatient. So, here's a rundown of the super easy and inexpensive way to make your own yogurt!
Materials:
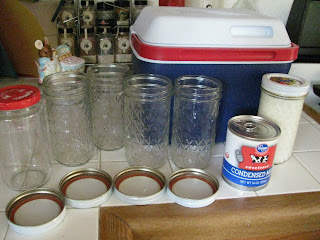
a cooler
sterilized GLASS jars (see notes)
food thermometer (candy, meat, whatever)
saucepan
any live culture plain yogurt
milk (raw or pasteurized; whole or 2%)
water, and a way to reheat it
optional - sweetened condensed milk, vanilla, other flavorings (I like to flavor with fruit syrup)
Directions:
1. Heat your milk in a saucepan (don't microwave; I think you could change important milk proteins). If it's older or your really concerned about bacteria, heat it to just boiling and then cool it. Just make sure the milk is about 120 degrees F (see note below). When you add room temperature stuff, the milk will decrease a bit in temp.

2. Add 2 heaping Tablespoons live culture yogurt in smaller jars, 1/2 Cup in larger jars. Add any other ingredients (mine below have sweetened condensed milk, and one has acai juice; always leave one plain so you can use it as your starter for the next batch).

3. Pour the warm milk in the jars until a bit below the rim. Please note that it is rather difficult to take a picture and pour milk at the same time, so don't try that unless you want a mess. Or use a funnel.
4. Stir really well with a fork or spoon. If you don't distribute the yogurt into the milk, your culture will be really slow going. Put lids on the jars.

5. Put warm water into the cooler. Be careful not to put in so much that they'll cover the top lid of the glass jar. Heat portions of the water until its 120 degrees F, or just under.
6. Put the jars in the cooler and close it on up. Check the water temp every hour or two. Try to keep the water temp about 120 degrees, 'cause it'll lose heat over time. I scoop out water with a mug, microwave it a minute, and then pour the water back in. I repeat until I get the water to the right temperature. However you keep the temp right is up to you.

7. Let it go for 8-12 hours; however long it takes for it to stay put when you tilt the jar. Then put it in the fridge to stop the process. Otherwise it curdles.
I don't have a picture of the finished product. I'll try to get one up soon. If you do plain yogurt, you can strain it with a cheese cloth to make yogurt cheese. Kind of like cream cheese but more tart. I like it with grated carrot, pimentos, and garlic salt. You can see instructions for that at the website I mentioned above.
I love my yogurt with honey and nutmeg, personally. I'm trying out the sweetened condensed milk mixed from the get-go on my mom's recommendation. Apparently when she was in college, they would make yogurt from sweetened condensed milk and put it on the space heater instead of in a cooler. I don't know if I can handle quite that much sugar, but it sounded yummy enough to try a smaller amount mixed with my milk. I hope anyone who tries it enjoys!
(Notes)
Glass Jars: They must be glass, from what I understand. I think it's probably because glass conducts heat better, plus there's no risk of any plastic toxin leaching into the yogurt. You can buy mason jars online or at a kitchen or grocery store. Or you can be really resourceful and save and clean your glass jars from jam, spaghetti sauce or whatever. I run mine through the dishwasher. The only ones I wouldn't recommend for this are pickle jars or other really strong smelling jars. Those need to air out forever before you can get the taste out of them.
Temperature: The bacteria that make yogurt thrive at 115 degrees F. They will grow between the temperatures of 98 and 125ish degrees F. Any higher than 125 (if I remember correctly), and they die. Any lower than 98, and they go dormant. Many sites suggest 90-110 degrees. I've found my yogurt takes forever at these temps. I get thicker yogurt at a median incubation of 115 degrees.


